Sunday, 24 April 2011

"Has God forgotten all I have done for him?"

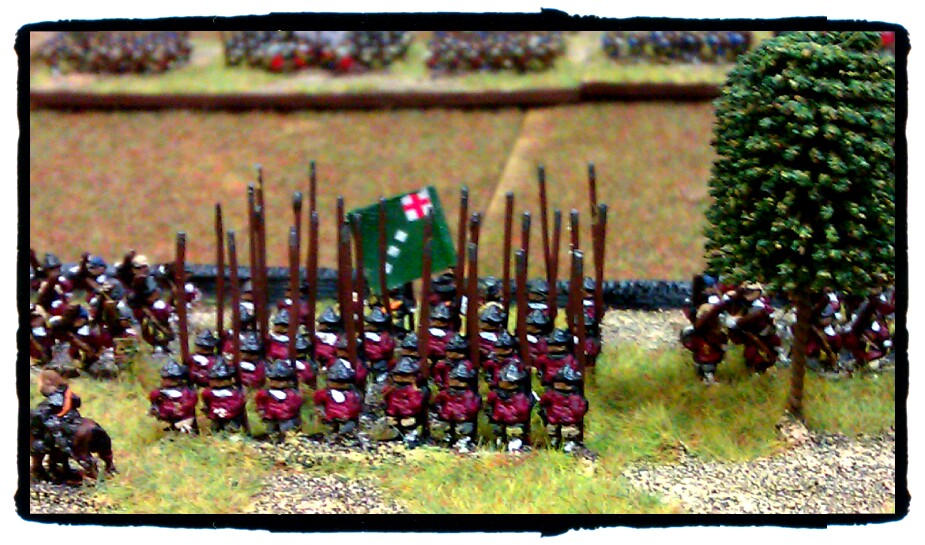
Myself, John and Rob B got together for a game of Black Powder using Johns rather splendid 15mm Marlburian’s.

John had written a quick scenario pitching the Sun Kings French against Bavarians.

I have commented before that these rules do lend themselves very well to scenario based games rather than straight up head-to-head matches and this game certainly boosted this opinion.

I was playing the French and I had 5 brigades.  3 of foot and 2 of Cavalry.  The 1st foot brigade started the game deployed anywhere on the table and chose to put these on the top of a small rise towards the centre of the table.  Both Rob (B) and I had rolled to see where and when our other brigades were to arrive.  My own from a possible 3 locations on my end of the table and Rob (B) likewise from his end.  Neither of us knew the strength the direction or the timing of the enemies arrival.


I deployed my 1st Brigade with two battalions of Guard flanked by two artillery batteries.  Two reserve battalions of Line infantry were deployed behind but I chose to keep these in Column of March in order to allow for swift movement if needed.

Rob (B) has his 1st Brigade come on wide to my left which meant he was outside the arc of my deployed Cannon.  This Brigade of Cavalry threatened to be able to flank charge my 1st Brigade.  However my reserve columns in the rear came good as they swiftly marched to meet this threat.  Bizarrely; thanks to some appalling command rolling for the next few turns I failed to deploy from Column to line and Rob (B) failed to execute a charge order.

My 2nd, 3rd, 4th and 5th Brigades trundled on over the next 3 turns but again my command rolls kept failing which limited the Brigades movement to a single move per turn. (Units in Column can make one move even if orders have failed).


Rob B was having similar luck with his command rolls so the game slowed somewhat as both sides tried to get their Brigades in to position.

Rob B finally managed to charge one of my Line Battalions that had moved to the right of my Guard battalions on the hill.  They gave effective closing fire and then beat off the charging light horse with such affect that the unit routed.  First Blood to me.

The way both forces had come on to the field;  I was looking very strong on the right but my superiority in numbers would only count if I could now wheel my front line anti-clockwise to engage the enemy Brigades.


On my left things looked a bit shaky.  A brigade of cavalry repeatedly failed to follow orders and though I was hoping to get them in position to secure the French left flank to support the single battalion of French line infantry the cavalry remained too far from the action to have any effect.

Eventually Rob B brought an artillery battery in range and then charged home with two battalion of heavy cavalry which swept the battered French away.  The French left was now dangerously exposed. Although reinforcements were sweeping in from the rear. If I could not get these reinforcements deployed, Rob (B) was position to roll up my whole line.


In the end; though I probably outnumbered Rob (B) on the table, he was much better placed to secure a Bavarian Victory.

The most impressive thing about these Black Powder rules is how authentic the battles seem to look on the table top.  I hope from the photo’s above you will see how these Brigades are being fed in to the line and form in multiple lines in order to provide support.


The beautifully painted miniatures that John has have inspired me to crack on with my 15mm Great Northern War Russian.


Friday, 15 April 2011

A horse, a horse my kingdom for [some light] horse.

A 400 point game using my Medieval Polish against Mick’s Mongol army. 

The Mongol army, as expected is very effective in this game with every single unit carrying a bow and the army basically a mix of light cavalry and medium cavalry.

My poles have been updated a bit using the new Polish/Lithuanian army list published in Extra Impetus.  Unlike the Beta list, this does allow you to field a cavalry only army and also introduces some more cavalry options with the inclusion of Tartars and of Lithuanian Nobles which can be fielded as Medium or Light Cavalry and are equipped with Javelins to give them a ranged attack as well as melee.

I would have liked to have a Cavalry only army but unfortunately my force was built up using the old Beta list and I simply did not have enough of the right figures to do this.  As such I still had to have a significant number of infantry (Town Militia armed with Crossbow and Pavisse).  This was going to cause me a major handicap.

To begin with we used Bob’s new pre-battle phase which he has been working on.  The two armies engage in three pre-battle phases which can effect the army and bring to each game a more individual scenario.  The phases are Pre-Battle Manouvering, Pre-Battle Foraging and Speed of Approach.  Dice are allocated depending on the number of commands and command structure of the army and a winner and loser of each phase established.    Depending on results you can end up with not all units on the table at the start of the game, tired units (losing a point of impetus on their statistics), being able to deploy anywhere outside the enemy’s deployment zone or occupying a terrain feature before the game begins.  These supplementary rules will be put on the clubs website shortly.


The idea is good and seemed to work well though needs a bit of tweaking.  As I write I think version 1.2 has just landed in my in-box.

I managed to steal a march on Mick and though one two of my units were straggling behind I was able to deploy one command anywhere outside of Micks deployment zone.  I opted to push main command as far forward as possible.  When ever I play the Polish I find that the heavy cavalry hardly ever manage to contact an opponent as they are in fact quite slow (movement of 8cm compared to the 12 of light cavalry).  I threw a screen of light cavalry in to try and soften up the enemy medium cavalry and disperse the enemy light cavalry.

My other command was a mix of light cavalry and my infantry.  I accepted that the infantry were effectively useless, they were too slow to be able to engage the enemy so they simply had to be an anchor to try and keep that command from routing if/when the light cavalry started taking casualties.  The plan was to pin Micks right wing with this command while trying to wipe out his left with the death ride of the Polish Knights. 

Of course I knew I was in trouble before we even started.  This Polish army is very difficult to play.  The knights are really powerful while fresh but they take so long to get in to combat that they invariable have taken casualties before they contact which considerably weakens them.  Unfortunately I have found it difficult to find the right balance to the army which has enough supporting light cavalry to provide an  effective screen.

To date I have only won a single game with the Polish Army and I had yet to cause a single casualty with My Polish Knights, supposedly the strongest part of the army.


My objectives were limited therefore to just trying to kill a single unit of Mick’s with my 4 units of Heavy Cavalry.  I was to be disappointed.

Mick is learning to handle this Mongol army effectively  and as I rumbled forward with the heavy cavalry, the manoeuvrable Mongols slipped to the side and in manner which; must have been so familiar to their contemporary western enemies; poured arrows in to the flanks of the cumbersome heavy cavalry.  Mick rotated his light horse units up both flanks, my miniscule light horse screen was torn off and the knights were exposed to volley after volley of missile fire.  Before long all 4 units were disordered and taking casualties.   

On the left things were no better.  I did not have the numbers of horse to take on the Mongols and my infantry were; as expected trudging forward at a painfully slow rate.   They would have held long enough if the knights would have been able to do their job but after a short while the knights were surrounded and lashing out impotently at an enemy that they simply could not come to grips with. 

The result was a one sided thrashing similar to the majority historical encounters.  I lost a total of 5 units and those that were still on the field had all sustained significant casualties (except the infantry that were still sauntering towards the action).  I had failed to destroy a single unit of Mongols…….again.


The new Polish/Lithuanian army list will give me much more flexibility than the old list but it will require me purchasing some more figures (not that I am complaining).  I would like to try it out with an all mounted army with the focus on more of the lighter cavalry than the heavy knights which so far have failed to stand up to any opponent.  The alternative is to go heavier with the infantry and War Wagons and simply sit in one place and force the opponent  to attack which may be effective but is a bit dull!

So it’s more scratching of the head with my Poles.  I am sure there is a historic win for them somewhere but it is a matter of coaxing one out of them! 


Monday, 4 April 2011

Pour la France et la République

Last year I finally started on a Napoleonic Army after years of avoiding them due the expense and difficulty painting them.  I had briefly flirted with a Baccus 6mm army but got so little enjoyment out of painting them I shelved that. 

However once Perry, Victrix and Warlord started producing the 28mm Plastics then the expense thing was not really an issue and so it was just the time and skill needed to paint up a decent sized 28mm army. 

Painting is a big bit of the hobby for me so I decided to take this on.  I chose the later Napoleonic French. 1812 onwards and purchased my first box of French Infantry from Perry Miniatures.

I was determined to learn lessons from past folly with this project by organising and planning the army from the start. Unfortunately I am one of those wargamers that buys pretty toys and starts painting them with no idea how I am going to use the figures painted up (hence my single Prussian Sky Fortress for Dystopian Wars!).

For 28mm I did not want to base each figure individually as the army would ultimately be quite large.  At the same time I wanted to have some flexibility in respect of rules and be able to use the figures for various games including skirmish games and bigger battles.

The chances are that the army would be used for Black Powder more than any other rule set so that was the reference point for organisation.  

It was also important not to be too ambitious in respect of the scale of my army.  I wanted it to be in a position to play quite early and also have the opportunity to add to it over time.  Given the time I have to paint (about 1 hour a day on average) trying to do battalions of 36 figures each was simply going to take too long.

Organisation

8 out of 10 Line Infantry and Grenadiers/Guard were based 40x40mm bases with four figures a base.  2 out of 10 based individually on 20x20 mm bases. 

4 out of 6 Light Infantry based on 40x40 based with 2 figures a base with 2 out of 6 on individual 20x20mm bases.

These were then placed on 100x40mm movement trays with 10 figures per tray.  

Two movement trays together with a 40x40mm Command Stand makes up a “unit” for Black Powder.  This allows for a frontage in line of 240mm and allows the unit to form Line, Attack Column, March column and Square relatively easily (see below).


Cavalry had a similar System.

6 out of 8 Cavalry based on 50x50 bases with two figures per base.
2 out of 8 Cavalry based singularly on 25x50mm bases.
Command and Musician figures a based singularly.

Cavalry are then formed on to 100x50mm movement trays with 4 figures per tray.  Two trays (8 figures) plus a command/musician make up a “Unit”

My logic here is that with relatively few figures I could put together a number of “Brigades” each with 2 to 3 units in and maintain enough flexibility to represent the different formations.

A “Brigade” could be made up of a Brigadier and Staff (say 3 figures) and 3 of the above “units” (about 60-70 figures).  Added to this are 4 Voltiguer/Light Foot bases that can be attached/detached to the foot units.

  A Cavalry Brigade of 3 “units” would be about 27 mounted figures.

Artillery can be based on singles due to the small number required.  I experimented with basing the artillery piece separate to the crew so the piece could be reversed and placed next to a horse team for limbered and then the crew “attached” to in when unlimbered.  I wasn’t happy with the result of this though so decided to base the artillery with crew and spend a few extra quid on a limbered piece to replace the unlimbered when playing.

Paint Schemes.

My painting skill definitely falls in to the “mediocre” category.  Though I do enjoy the research I felt that basing the army around particular historical formations was a waste of time as my painting skills do not allow for extensive detail on the miniatures such as shako plates etc.  The Perry Miniatures are perfectly designed for paining bulk armies as so many are in great coats than one does not have to spend hours and hours picking out the piping and uniform detail.


There has been a lot of discussion about “dipping” recently, especially with the Army Painter specialist dips now available.  I opted for “dip lite”.  I simply did each miniature in the base colours and then painted a heavy wash using the Games Workshop Sepia ink.   I found this just the finish I was looking for.  I plan to take much more care over the officer and character figures of the army than the core troops.

Basing.
It has taken me a long time to come up with a basing method that I am happy with.  Now I use a coat of PVA glue with fine to medium ballast mix.  I then seal that with a coat of watered down PVA mixed with dark earth coloured paint, dry brush that with a light/sand colour and then pick out veins of static grass and flock with the odd feature of grass clumps etc.


The Result.
So far I am happy with the result.  I should be in a position to field the army in a few months and I can also keep adding to it and steadily enlarging the unit sizes.  Let’s not kid anyone; when compared to what we see on Saxon Dog’s website, this army is not going to win any prizes for painting but I am satisfied enough so far on how it looks on the table top.


I am currently taking a break from the blue and white of the French to work on a 15mm Wallachian army for Impetus which I started a long time ago before getting side tracked.  However once complete I will post a photo for the full army which should be:

2  Line brigades,
1 Guard brigade
1 Light Cavalry Brigade
1 Heavy Cavalry brigade.

Thursday, 17 March 2011

[NOT] Galloping at Everything!

16th March 2011-03-17
6mm Black Powder.


We wanted a game of Black Powder but as my own 28mm French Napoleonic Army is still in training our choice of scale was a bit limited.  In the end we decided to use my own and Rob (B)’s 6mm Napoleonics which have been put on the 60mm frontage bases for the Polemos system.

The Scenario was a variation of the fighting withdrawal scenario in the Black Powder Rules Book.  A small British Force trying to get from one end of a 6ft table to another, hotly pursued by a larger French force.

Order of Battle.

British.
1st Brigade
2 Battalions Line Infantry
1 Battery of Foot Artillery
2nd Brigade
2 Battalions of Line Infantry
1 Battalion of Light Infantry
3rd Brigade
2 Battalions of Hussars
1 Battery of Horse Artillery

French
1st Brigade
3 Battalions Line Infantry
1 Battery of Foot Artillery
2nd Brigade
2 Battalions of Line Infantry
1 Battalion of Guard Infantry
1 Battery of Foot Artillery
3d Brigade
2 Battalions of Dragoons
1 Battalion of Hussars

Each side had 2 Brigadiers with a staff rating of 7 and 1 with a staff rating of 6.

Deployment
Both sides opted to deploy in March Column and initially it looked like it would be a simple foot race to the end of the table.

Obviously before we could start we had to have the usual discussion with Bob about the rules and how they are written.  Rob (B) and I are fond of all the pretty pictures of toys while Bob is disapproving of “fluff”. Luckily things didn’t get heated thanks to my clever use of a mini bag of Haribo Star Mix.

I have to admit that Bob has a point about using the book when actually playing the game.  Although enjoyable on the first read we did struggle to identify specific rules during play.  I think an index would have be really useful. The situation was not helped however by the fact that Rob (B) had enjoyed looking at all the pictures so much, he had neglected to actually read the rules!


For those who have not played Black Powder yet; a main part of the game is the Command phase.  One has to “declare” their orders to the brigade by stating what they are intending to do.  For example;  “The Brigade will advance in column to beyond the trees and then deploy in to line”.  You then roll against the Brigadiers staff rating to see if the orders are communicated efficiently or not.  This can mean that a Brigade could get to have up to 3 moves in a turn or none.  This gives a lot of freedom of movement in that a battalion or brigade could potentially march, deploy in to line and then advance in line all in one turn. 

The Game 
Things started badly for the British.  They failed nearly every command role and would have remained stationary but for the 1 free move they got for being in march column.

The French did better,  moving out for the confines of a wooded are and on to open ground where they could release the cavalry and deploy in to attack formations.  The French Brigade on the left deployed in to Attack Columns and, on the right the Cavalry in to line thus forcing a nearby British Battalion to form Square.


Things then got worse for the British as a blundered command role caused a Brigade which up until then was making good it’s escape, turned about face and advance directly on the enemy.  Clearly not quite grasping the concept of a fighting withdrawal.  The manoeuvre blocked the British guns and put two battalions of infantry in the path of 2 supported  French Attack Columns who; with trumpets blaring were barrelling towards them.

Luckily for the British things then started going down hill for the French as their  command rolls starting drying up and as the French charged home we realised that the British had an Artillery battery on their  right and the infantry battalion in square to their left which were both close enough to count as flank support.

Despite the overwhelming melee strength of the French in their Attack Columns the British held their ground initially and then forced one of the French formations, to retire.

The French cavalry had ground to a halt and though supporting the infantry as it went in to the attack but not able to advance up the field and cut off the British escape as I had hoped.

The result was a draw.  The British were doing well in the centre but were pinned there and would find it difficult to withdraw, the French at the same time had lost any momentum and would struggle to cut off the British without sustaining heavy losses.

Unfortunately we didn’t get to properly finish the game as we ran out of time.  As with any new rule set a lot of time was spent pouring over the rule book and as mentioned above we did find it very difficult to find rules quickly and resolve issues.


Rob (B) and I felt that 6mm on the 60x40mm bases did not really work with this set of rules either.  You really need the flexibility that larger scales (or smaller bases) give you.  Saying that, I do really like these rules!  They are simple, fun and the open play and freedom of movement means one avoids those silly situations where formations; due to the draconian movement rules, spend the game wheeling one way and then the other trying to get in to the right position.  I am looking forward to playing Black Powder more but Rob (B) was a little put off due to the fact that because of his terrible command roles we dubbed it “Rob’s Static Phase”  (we forgot that he could have actually used the battalions own initiative to move when close to the enemy and did not find the rules until we were packing up….oops).

 Finally an apology for the quality of the pictures, I rushed these I'm afraid so the quality is terrible.

Rob S


Thursday, 10 March 2011

Baccus 6mm English Civil War Scenario


A scenario based game for Impetus Baroque using Rob (B) Baccus 6mm English Civil War figures.

The basis of the game was a simple objective based scenario.  A force of late war Royalists attempting to occupy two enclosed fields which were being held by the New Model Army.

It involved 4 players;  myself and  Bob handling Parliament with Mick and Rob (B) being for the King.

The two armies were has one would expect; mostly foot with the New Model having the majority of better quality infantry.  These supported by Galloping Cavalry on the side of the royalist and Trotting Cavalry for Parliament.  In Impetus Baroque, the Galloping Cavalry reflect Cavalry of the Swedish School, charging En-Haye in to contact with sword and pistols used as melee weapons.   The Trotters are of the German School, with deeper formations, attacking at the trot and firing on the enemy before contact.  The Gallopers have a better Melee Value but the Trotters are able to discharge their pistols before contact getting a two dice roll to try and break up the enemies charge.

Deployment was as standard with infantry in large blocks in the centre with cavalry on the wings. The Parliamentarians had  3 units of foot on the table and two units of Cavalry on table with a further two to come on after the 2nd turn on a successful reserve roll. Two of the Parliamentarian foot units occupied the enclosures which were the Royalist objectives.

Rob (B)’s figures were ideally suited to this game.  I don’t have many 6mm figures myself as I don’t enjoy painting them.  However there is no doubt that when presented en mass on good bases they look excellent on the table top.  Rob(B) has based his on large bases with a 12cm front, a large block of pike in the centre and musketeers on the wings.  This allows room for a good level of detail on the terrain with casualties, officers and even trees built on to the bases to turn each in to a mini diorama. 

All the terrain was by Baccus with the game board being one of Games Workshops own.


I had agreed with Bob that he would hold on with what he had and I would get the benefits of the reserves (when they arrived)  to try and win the game with a counter attack on the right.

I certainly felt confident at the beginning as I thought Rob (B) had got the forces a little two even for an attack –v- defense game and that the Royalist’s would simply not have the strength in numbers to push through the disciplined New Model. How wrong I was!

Things started as one would expect with a short artillery bombardment with no success on either side.  The Royalist Cavalry then advanced on the wings.  Things moved quite quickly as there was not a lot of movement on the part of Parliament as they already occupied the objectives.

On the New Model’s left I had an advantage in Cavalry numbers but they were not of as good  quality as the Royalist, still I was sure I could clear the enemy horse and then be free to threaten Rob (B)’s flank as he advanced on the objectives.  Rob (B) would then have to make a decision whether to move his greater number of foot all onto the objective and leave his flank exposed or peel off some of this infantry to pin my Cavalry.

I moved by cavalry forward in two lines, the plan was to sacrifice the first but in doing so weaken the enemy enough so that the 2nd line would be able to finish them off.  I was boosted by the arrival of additional units following our successful reserve roll on the Turn 3.

The plan worked well and as anticipated I lost my first unit but my second line disposed of the enemy cavalry.  The only draw back was that the melee had pushed my cavalry way out of position and it would take them a number of turns to maneuver into a position that was threatening to the enemy foot.


Bob had been doing his part, the had traded blows with the cavalry but though initially getting the better of it, he burst through an enemy cavalry unit, straight in to the jaws of the waiting musketeers. 

Rob (B) made the bold decision (despite my baiting him)  to ignore my cavalry and throw everything at the objective.  Given that we were running out of time this made sense so he gathered two units of foot and marched them steadily towards the waiting muskets of the roundheads.

Bob was outnumbered on the left but both of us held the objectives and were emplaced behind a wall. 

Unfortunately the sheer weight of fire being poured on to Parliamentarians began to take it’s toll.  Bob lost the objective on the left and then on the last turn just as my Cavalry were formed and ready to charge the enemy foot, Rob (B) forced the wall and took the objective on the right for an excellent Royalist victory.


A good game and a brilliant example how irrespective of how strong you think your position is, there is always room for things to go disastrously wrong! I felt that Bob and I where really in the driving seat  and the Royalist just would not have the manpower to push us back off the objectives.  However by being bold and concentrating their numbers in the right place (and at the right time) Mick and Rob (B) were able to snatch an impressive win.

Friday, 18 February 2011

New War, New Rules

After buying some of the excellent 20mm Afghan and British modern
miniatures by Britannia, Mark B and I set about devising some rules for use in this period.  AK47 rules had been recommended as had Ambush Alley but these we felt were not quite what we were
after.
 
While writing and play testing some rules tailored for the war in
Afghanistan, I have been thinking a lot about the conflict and the peculiarities of it compared to other conflicts and how one can factor these in to a tabletop game which is both balanced yet accurate.
 
On the face of it, this can be quite difficult.  The UN Forces have superior firepower and training and have access to resources such as air support and artillery not
available to the insurgent forces. 

The insurgents have none of this but they do have over 1000 years of experience fighting in the terrain. 

So how can we abstract this in to a set of rules that are playable?
 
Firstly we felt it was necessary to limit air support factor by having
the engagement take place “danger close” in other words with the UN forces being so close to the enemy as to make Artillery and air support risky.  There is a common misconception that “smart” weapons can drop a bomb or fire a missile through the car window of the enemy.  Unfortunately the reality is somewhat different.  There is a margin of error of about 300 meters which means if friendly forces are closer to
the enemy than 300 meters a friendly fire incident begins to become more probable.
 
Secondly and we felt fundamental to this particular conflict is the
political will of each side to achieve their objectives.
 
If we look at the British involvement in Afghanistan for example there is not the public support for the conflict as there was for say the Falklands War. The result is that there is a lack of  political will to accept any significant number of casualties, certainly over a short period of time.  The result?  Commanders on the ground are forced to
make tactical compromises which may go against their doctrine and instincts.  It leads to a lack of aggressive actions and forces the troops on the ground on to the back foot.  The insurgency is not constrained by the need for popular public support. 
The nature of their organisation is such that as long as they have the
lines of communication to get fighters to front lines then their priority can be their military objectives.
 
This has created a significant leveller between the two combatants and is something we felt was important to introduce to the rules.
 
In the end what we have done is write in a rule for the UN forces that if they sustain a single casualty within a Combat Section then the whole section becomes suppressed until that casualty is attended to by a medical team or withdraws the casualty to the CP.
 
In addition; The insurgent player achieves considerable victory points for causing casialties.
What we have found is that when play testing the game the result is that aggressive actions by the UN player can run out of impetus very quickly and it can make it very difficult for the player to achieve its objectives.
 
For example, we played last week a scenario game where there was a broken
down UN APC.  The British player had
to enter a compound, collect the two stranded soldiers and then withdraw far
enough to be able to allow air support to destroy the APC.  The Taliban player was attempting to capture one of the APC occupants alive.
 
The outset looked pretty positive for the British who with their advantage in weapons and training took a heavy toll on the Afghan fighters.  However, as sections began to take
individual casualties the whole platoon stumbled to a halt as the priorities of
the sections changed.
 
The end result was that; in casualties the Brits had a decisive victory in causing about 9:1.  However even though they made contact with the APC they were unable to extract and so the
tactical victory went to the Taliban.
 
The rules are in no way complete but seem to be coming on well.   I will post a copy of the same on the Leeds Wargames Club website shortly for people to view and comment
on.
Published with Blogger-droid v1.6.7

Tuesday, 15 February 2011

20mm Afghans and British (modern)

15th February 2011

Various pictures taken with my andoid camera phone and using some basic photo editing suite for Android


Published with Blogger-droid v1.6.7