Tuesday, 30 August 2011

A Hard Day on the Fosse Way.


Battle of Stow-on-the-Wold.

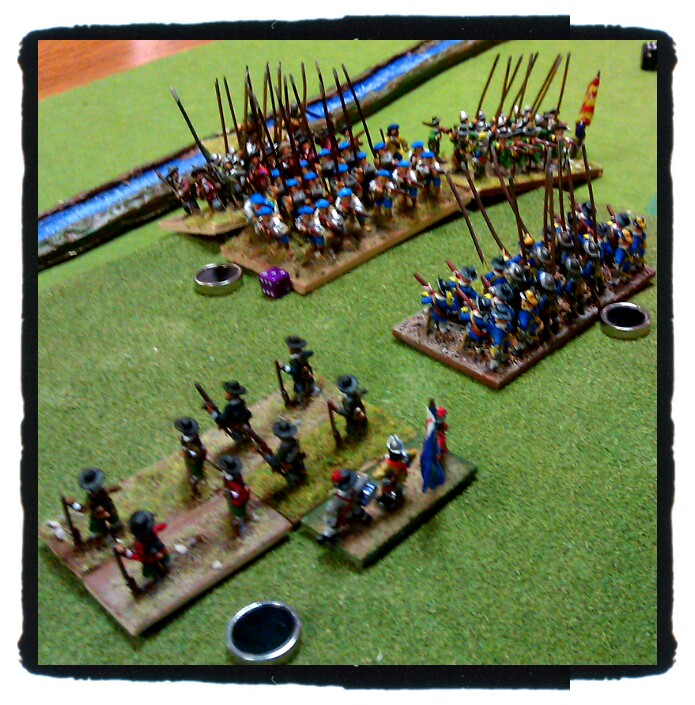
A English Civil War game using the Baroque supplement for Basic Impetus.

This was a historical refight of one of the closing battles of the Civil Wars with a motley crew of poor quality Royalist garrison troops defending a ridge against Parliaments New Model.

I was for the King and had a good position, occupying a long ridge that ran the width of the battle field. That was the extent of the good news. Other than three units of reasonable galloping horse my foot was pretty poor and I was up against the best that Mr Cromwell and his friends had to offer.


All I had to do though was hang on for 2 hours or so, hold the ridge and stop my army from routing. (Historically the Royalist stood for a whole half-an-hour before fleeing).

Opposite me was a mixture of good quality foot and trotting horse and units of Dragoons. Each side was also given a single artillery battery but we agreed that these would have a single dice shot (needing “6” in order to cause casualties.

We also reduced the musket range down to half the distance of those stated in the Basic Rules.

One draw back was that I had to deploy as per the historical account which meant I had a pretty thin line with cavalry on the wings and my better troops scattered along the line amongst the poorer garrison troops. Ideally I would have liked to concentrate my better troops or at least deploy some as a reserve behind the ridge.


To begin with I was doing very little. I had superior cavalry on the right so advanced these off the hill to threaten Micks left and give his Centre something to think about. Micks centre was very strong with three crack regiments of foot.

On the right I had some more galloping horse and a single unit of dragoons. I was outnumbered here but wanted to try and mess the lines up a bit to make it difficult for Mick to re-deploy and turn in to my flank if/when he got past this wing.

Mick had clearly decided to start with an assault on the left of my line. He advanced his trotting horse and dragoons and they were soon exchanging fire with my own dragoons. The first of many dreadful saving throws resulted in my dragoons being swept aside. I responded with a charge down the hill in to Mick’s advancing cavalry. The swept through one unit of trotting horse before following up in to a second and being shot to pieces my the trotters horse pistols.

Straight away my left was looking problematic.


On the right my cavalry sat staring at a regiment of foot supported by a cavalry regiment but there was no need to advance on to them. The longer the enemy stayed put the better my chances of a win.

In the centre the Parliamentarian crack units advanced on my garrison troops with grim inevitability.

I had one good unit of Foot and a weakened unit of Cavalry remaining on the left but they were massively outnumbered. I opted to withdraw these off the ridge but not too far. This would keep them out of harms way in the short term while being too much of a threat to allow Micks right to turn in to my centre (a refused flank if you like).


The musketry began in earnest in the centre now and the grim reality of the situation became apparent. After some more disastrous saving throws I immediately lost a regiment of foot and two others were significantly weakened. As a result I had a single dice for each of my remaining three units while Mick was rolling on 4 dice per each of his regiments. At this point there was no point in Mick closing with me as it was quite obvious it was only a matter of time before he could shoot me off the hill with minimum risk to his own forces.

I was nervously looking at my watch now, counting the minutes before the game ended. I was tempted to spend precious minutes rule hunting during my turn but this was not the Cavalier thing to do.

I still had a fresh infantry unit and two units of fresh cavalry on the right. I stripped one of the cavalry regiments to bolster the centre and but the writing was already on the wall.

Micks Dragoons and Cavalry pressed forward in to my refused left flank and in quick succession knocked out a further infantry unit and the weakened cavalry unit. This took my army past the break point and my army routed.


A decisive victory for Parliament with Mick losing only 2 units to my 5. However I can be quietly please that at least I lasted longer than the royalist on the day!

Given all I had to do was hold on I think I should have done more to actually slow the advance of Mick’s troops. My choices were limited by the deployment but still though I never had a shot at beating the New Model, I think I could have held them just for a bit long. The game ended after 1 ½ hours of the 2 hours allotted. Just half-an-hour longer…….


Wednesday, 17 August 2011

Not How Many but Where.


My first foray in to Hail Caesar this week.

A few of us were involved as there was quite a bit of interest in how it would play. Lon has brought enough toys for two armies (though some were still sporting their black undercoat) so it would be Spartans and their Allies versus the Athenians in a straight up slogging match.

The Hail Caesar rules are really easy to pick up if you have ever played Warmaster, or any of the Warhammer derivatives. Shooting and combat revolve around a “Hit”, “Wound”, “Save” dynamic, namely three rolls to determine how many casualties a unit takes. Each of these rolls may be modified by tactical factors and special rules. This makes it easy to get used to, easy to remember and easy to play.


Movement and Orders is exactly the same as Black Powder with “Brigade” commanders giving orders to their Brigades or Units and then rolling to see if the orders are successfully interpreted/implemented.

What is good about this game is the distance the two opponents can cover quickly with good command rolls. In a game such as this where there is little sweeping manoeuvre and much more rumbling forwards while trash talking the enemy.

I had deployed with my strongest Spartan Hoplite unit to the centre with a screen of Helots to their front and a supporting Lacedaemian Hoplite behind them. On the left was another two units of Lacedaemian Hoplites again screened by some small units of skirmishing Helots.


The Athenians lined up with two Hoplite phalanxes facing my Spartans with some cavalry, skirmishers and a final Hoplite Unit facing my left. I was out flanked slightly on both sides but felt the "Shock and Awe" would win the day with a death or bust charge right up the centre.

Between the two armies was a sunken road which may cause disruption to the whomever crossed it.

Things got of to a good start and my Spartan Juggernaut hunkered down and headed straight for the heart of the Athenian line. On my left Chris sent his horse galloping forward forcing a unit of my Lacedaemians to form a defensive formation to avoid being charged in the flank.


The Skirmishers on both side exchanged stones from their slings but with little effect other than to push them back behind their heavier brothers.

Finally as I approached the sunken road I gave my Spartans a Charge order to try and get to grips with the Athenians as soon as possible. I trotted up to the road to low and behold find a unit of Elite Athenian Hoplites waiting for me in the dead ground. I bundled in to them and amidst much grunting and swearing and the odd somewhat homophobic jape, the real tussle began.


I had lost my charge bonus but I was still a superior unit to the Athenians. I chose not to lock shields (where I would lose on attacking dice but gain on saving throws) and went all in. Initially the Athenian who had locked shields held their ground.

Unfortunately what this meant was that the Athenian helots could fire over the heads of my Spartans (who were below them in the sunken road) at my supporting unit with impunity.

However this only lasted a round or two before the Spartans burst through the best that Athens had to offer and followed up in to a supporting Athenian phalanx. They were somewhat weaker at this stage and things would not prove so easy. On the Spartan right, an overlapping unit of Athenian Hoplites marched past then and charged my supporting Lacedaemians.


One of Chris’ Hoplite units charged my only non-engaged Lacedaemian unit and battle was joined in earnest as all my troops were now engaged.

The slugfest commenced with units all along the line trading tit-for-tat blows with the momentum swinging one way and then the other as the Gods played their games with us.

In the end I think it was a somewhat pyrrhic victory for Sparta, they had caused the greatest damage and “looked” the stronger but they did not hold the field.

I enjoyed the Hail Caesar rules but have to say that I do not see what there is to attract the player that already has Warmaster (though perhaps slightly faster play).

Monday, 8 August 2011

Somewhere in northwest India……..


I have been a bit lax of late with games and subsequent games reports recently.  As such Bob was kind enough to write a rather excellent report  following a game at the club between him and Mick last week.

A fictional conflict using historical opponents, later Skythians with a combination of light horse archers and cataphracts coming to blows with a contemporary Indian force featuring lots of infantry longbows supported by light javelin armed foot, a couple of elephant units, a chariot force and some pretty dreadful cavalry.
We actually messed up both the terrain and deployment rules within Impetus but we carried on regardless. As might be expected the more mobile Skythians cavalry advantage forced the Indians to deploy first on to a pretty featureless plain. I was commander of the Skythians and Mick the Indians. He lined his eight archer units across the battlefield with a light infantry unit at each end. Two Cavalry units formed up slightly rearward at each end to prevent envelopment and his elephants and chariot in the rear. My side split into unequal lumps (lumps because they have a poor command structure so need to stay up close and personal with their generals), four light horse with four cataphract units in support on my left, three light horse with a single cataphract unit and further light horse to their rear on my right.


The Skythians rolled forward a little, the Indians advanced enough to get in long range bowshot range. The Indian longbow isn’t in the same class as the English medieval type and his shooting reflected this, as did mine when I rode units forward to reply. Not a hit (sixes or double fives) was recorded from the first 11 dice rolled! However with units relatively weak in strength (VBU) once hits started to occur units could quickly crumble.
First blood to the Skythians, on the right the light javelin armed foot decided to scarper after a couple of hits. Mick replied on his left where he shot down a horse archer unit that got too close and too cocky (it could have evaded out of range but I didn’t take the option).
Mick lost a longbow unit on his left and rode his general’s elephant unit into the resulting gap to fill it and bring the various missile weapons an elephant unit has to bear on the Skythians threatening his weakening infantry line. A bold, but ultimately doomed move as it turned out. The Skythian cataphracts on this side of the battlefield were further wide than the enemy elephant general and forced the Indian cavalry to fight them or be shot to pieces by horse archery. Indian cavalry are the only thing that doesn’t shoot in their army.


 Unfortunately they don’t fight very well, in pretty short order both such units were gone and the cataphracts were beyond the Indian flank. They’d taken a casualty though and attracted the interest of the second elephant; this spent the rest of the game trying to get at them. Mick’s elephant mounted General was now his left flank guard and the Skythian horse archers fancied elephant burgers for tea. Their constant sniping sapped its strength pretty rapidly.


On the left the Skythian shooting weakened the longbow units they faced. The cataphracts behind rolled forward to try and triple move into them. It didn’t work and instead stalled directly in front of them in a disorderly fashion. The longbows stepped forward to minimal range and rolled fistfuls of dice. Hits were recorded but no units lost as cataphracts are tough units to kill off quickly. On their next activation they girded their loins, dressed their ranks and rumbled into the archers, killing three units of them and then riding through the line to be faced by an Indian Prince in a chariot.


The Skythians had done a lot of damage but it was spread across two commands. The Indians had taken out only one enemy unit but had weakened several, including both Skythian General’s units. Both sides thought they could end things in their favour in one last turn….
Mick successfully activated both his commands before either Skythian. His dice failed him in pretty much every other way. He couldn’t clear disorder with the elephant trying to run down my right flank General so no melee and ineffective shooting saved him. On the other side of the field multiple longbow shots failed to finish off the other Skythian commander and the chariot didn’t land a hit on the cataphracts facing it.


The game was won when a veritable swarm of horse archers surrounded and took turns to pepper the Indian General astride his elephant. Finishing him off took his command to 50% losses and so they fled, which in turn took the whole Indian army to 50% and so they gave up and went home.
An excellent game (well I would say that, they were all my toys and I won!) which went down to the wire.
Skythian tribesmen have now acquired some nice new territories in northwest India; just a few Greek cities will need subduing before they can really settle down for a “Kush(an)y” lifestyle….just like what really happened.

Friday, 5 August 2011

“ Conscience is but a word that cowards use, devised at first to keep the strong in awe”


What with people being on holiday and my Wife upping her socialising (leaving me literally holding the baby) it has been a few weeks since I’ve been able to get to the club and organise a game.

Bob has been putting the finishing touches to a War of the Roses Campaign which I think will begin in earnest next week. This week though as it had been a while we opted for a “warm up” game of Impetus using Rob (B)’s 6mm Wars of the Roses miniatures.

I have a soft spot for the Richard III so I donned my Planta genista and prepared to take on the pretender and his mercenaries.


I had 4 units of Retinue Bow, the same of Retinue Billmen, some Swiss Mercenary pike, my King and the Retinue of impetuous heavy cavalry and two units of dismounted men-at-arms. Bob and Rob be were the house of Lancaster and they had slightly more units but lacked the dismounted men-at-arms.

I deployed with dismounted men-at-arms in the centre, flanked by 2 units of bowmen who in turn had the billmen behind them. The rules for the period allow units of heavy foot to interpenetrate the bowmen in front so this is a useful deployment for softening up the enemy before charging home. My mercenary pike were formed in to a large unit on the far right and my Nobles started the game on “opportunity” behind the line. As the noble Cavalry were impetuous I placed them on opportunity as this would prevent them having to compulsory move once the enemy came within 30cm.


Bob and Rob split their army in to two commands separated by a stand of trees to their front. Rob (B) had mercenary crossbow and retinue archers supported by a large unit of Irish warband and a unit of light horse. Bob had 2 units of bowmen and 2 units of billmen deployed the same as mine with his commanders retinue of impetuous heavy cavalry immediately behind.

Because of the stand of trees separating the two commands I realised that I had an opportunity to try and pin one command and hold on while focusing my strength and destroying the other. The question was which one.


I moved forward slightly to narrow the gap between me and the stand of trees, this would prevent Bob and Rob (B) from joining up once past. I then pushed my dismounted men-at-arms forward in front of my line. My logic here was if the enemy wanted to take on the men-at-arms they would be exposed to flanking fire from the bowmen. If they attacked the bow/bill units then risked being charged in the flank by the men-at-arms.


Rob (B) opted to try and take on my men-at-arms and moved his Irish Warband across to engage them. This meant however that they had to move across the front of 2 of my bow units and in doing so they sustained heavy casualties. He finally got in to contact but was so weakened that he bounced off my men-at-arms, who promptly counter charged and wiped them out. A good start for me thanks to some lucky dice rolling.

At the same time Rob (B) has sent his light horse round the back of my line and attacked one of my Billmen units from the rear. Again I managed to survive and Rob (B)’s disastrous saving throw meant that he also lost this unit. However the move had been enough for me to activate my Nobles and bring them over to my right as to deal with the threat.


As things stood at this point I had a good position. I had a strong line and had pushed a wedge between the two wings of the enemy all I needed to do now was decide what part of the enemy line I should look to destroy and what side to keep pinned. I decided that I would go for enemy on my left as I was not sure the numbers on the right were sufficient for a game win.

I swept aside the enemy bow and the billmen were now vulnerable from attack from their front and from each side by my mercenary pike and dismounted men-at-arms. Unfortunately I was then to a somewhat cheesy but legal manoeuvre by Bob. My mercenaries had come within 30cm of his mounted nobles who were impetuous. This meant they had to advance. They could not penetrate the friendly billmen to their front so the bill men had to be placed behind the nobles, out of range of all my foot who now would have to deal with fresh heavy cavalry rather than disordered heavy foot.

The enemy heavy cavalry made short work of my mercenary pike (who had already been weakened by enemy bow fire) then went through my bowmen but found harder work trying to see off the bill men behind. Meanwhile my nobles had done an about turn and were galloping to the rescue. On my right the two wings traded bowfire from a reasonably safe distance.


Unfortunately again we ran out of time before completing a game. We had not seen each other for a few weeks and this combined with Rob (B) producing box of fresh Krispy Kreme donuts meant that there had been a lot of gossiping and not enough dice rolling (of which I was no doubt the main culprit). I am fairly confident that Bob’s position was starting to look problematic and a few more turns may have led to a win for the House of York.

Hopefully we will press on with the Wars of the Roses Campaign from next week so lets hope this time York can not only win the battles but also win and keep hold of the crown!


Saturday, 18 June 2011

The world is grown so bad, that wrens make prey where eagles dare not perch".

Impetus is fast becoming the rule  set of choice for nearly all our games recently.  I think this is because it lends itself so well to different scales and periods.  The Baroque supplement is excellent for ECW/TYW games and the Basic set is ideal for a quick game if time is of the essence.

So it was using the Basic Rules that Rob (B) had devised a scenario for a re-fight of the Battle of Bosworth Field.


Being for Impetus Basic the armies were kept to about 12 stands aside.  I chose to be Richard as I do have a bit of a soft spot for him.  Mick and Rob (B) played Henry and John (S) was the Stanley.

Stanley deployed on my extreme right but his loyalty, as we know was questionable.  The rule was that he would come off the fence and fight for the side that destroyed an enemy stand.


Both side deployed with a line of longbow men in front of their dismounted men-at-arms and bill men (the rules allow for these units to interpenetrate without penalty.)  In addition each side has a stand of impetuous heavy cavalry.

Both armies began to rumble towards each other in to bow range and in typical Richard style he outstripped his foot troops with his cavalry and isolating himself.  I had a unit off Staves (light horse) which charged some Tudor skirmishers on the right but following a disastrous roll (see below) I failed to cause a casualty and was then disposed of clinically by these light troops.  This meant that first blood had gone to Henry and I found myself with Stanley to my rear and throwing his lot in with the enemy!


Things looked quite bad for me at this point.  Richard's cavalry looked doomed as they were isolated and I could not withdraw them due to their impetuous nature and I had a unit off bow and a I unit of bill men to my rear.  However I did outnumber Henry in the Centre.  What I needed to do was smash through hear and go for the points win before I got surrounded.

I had a unit of Irish heavy infantry that I had kept behind the battle line as a reserve and I turned them to face Stanley.  I was in bow range and so started to exchange volleys with the enemy.  Things went well for me here.  I softened up the bow, Mick then decided to commit his melee troops and marched through his bow units ready to charge my bowmen.   I had judged the distance here quite well for once and managed to disorder most of his melee troops before charging through my bowmen in to contact with them.  I had the advantage of fresh troops who were not disordered and it told.  I caused a lot of damage to his centre.


However Richard and his Heavy cavalry had been destroyed which gave Mick and Rob (B) a bunch of victory points.

Rob (B)'s Lancastrian heavy cavalry had been disordered and lost a casualty so were lacking their impetus bonus.  They were forced to charge a unit of fresh bill men.  This looked like it would be decisive.  If I could have finished this unit off it would have given me a points win.

Unfortunately things did not go exactly according to plan.  Rob (B) had manouvred his skirmishes and a unit of mercenary crossbow on to my right flank however they were blocked by Henry and his knights.  I had the Tudor pretender on the ropes put they managed to break off.  Because they had lost half their strenght they were not forced to charge again and this opened up my left to the Rob (B)'s flanking troops and their volleys was enough to finish off some weakened bowmen.  John has seen off my Irish foot and was marching in to my rear.  The Lancastrians now had enough points for a win unless I could force a draw by destroying one more unit of the enemy heavy foot.  


Unfortunately I didn't managed it and the game ended with a win for Henry Tudor.

A fun game with lots of discussion about the actual battle and a historical result.  A great little scenario for a club night and the special rule for Stanley did provide some extra depth.

Sunday, 5 June 2011

"You were good that day at Aldearn when you leapt among the pikes!"

A game of Impetous Baroque played between Andrew and Mick.


This was a scenario I was using from English Civil War Gaming Scenario's Volume 2 by Robert Giglio, an excellent supplement if you play this period. I adapted it for Impetus Baroque.

Unfortunately I have very few 15mm Scottish for the period and so used by English Civil War figures.


It was an attack versus defence game. The attacker has superior numbers but the Defender in a strong position and with reinforcements coming on to the field.  


The Scenario was that Mungo Campbell after receiving reinforcements has turned on Montrose who had been pursuing him.  Campbell had hoped to catch the rebel royalist unawares and launch as surprise attack against him.  Unfortunately one of his regiments cleared their muskets on the approach and gave Montrose a heads up that something was a foot.  The Montrose player has to hold on with limited forces long enough for his reinforcements to arrive.  The Campbell player has to cause as many casualties as possible to the enemy before Montrose can concentrate the rest of his army.


MAP


Montrose had one unit on Castle Hill, two units on Garlic Hill and the village was occupied by musketeers. Normally in Impetus units can not fire out of a Built up Area, however; historically as small amount of MacColla’s troops managed to fire at a very high rate from the buildings they occupied which did affect the battle so I allowed the Montrose player (Mick) to be able to nominate the village as a command and fire at any single target in range per turn.

I allowed for the Campbell player to deploy across the western edge of the table rather than on the narrower front in the original scenario.  This was simply to try and speed things up.  You will note from the map that the terrain is horrible for the attacker.   All the hills caused disorder troops moving across them as did the marsh, the Aldearn village hill and Castle Hill all slowed movement to half-speed.


The game started and Andrew (playing Campbell and the Covenanters) opted for a steady advance and to try and disorder and damage the enemy troops on the hills before closing with his larger pike-heavy units.
He had deployed his weak cavalry units on the right and to attempt to charge the unit on Garlic Hill in the flank.
Things went well for Andrew initially as his superior numbers started to cause damage to the enemy with their well aimed musketry.
As he lumbered up hill, Mick decided that there was no point standing and taking all this punishment so in true Macdonald fashion, hoisted up his kilt and charged down the hill in to the massed Covenanter regiments.

This turned out to be a good move as Andrew’s melee dice turned out not to be as fortuitous as his shooting.  His large pike units were whittled down and though they eventually beat Mick’s much smaller force they had suffered significant damage.  
Mick was now down to a single unit of MacColla’s life guard which though they were good quality troops were a very small unit so their VBU was not particularly high.
Mick was now starting to role for reinforcements.  He had two units of Cavalry and a Foot regiment if he could get them on the table.

The Covenanter cavalry which had been manoeuvring around the flank of the troops on Garlic Hill were now in range.  This was a poor qualify cavalry unit but nevertheless Andrew decided to “have a pop” with their pistols which are classed as “various weapons” on the Impetus firing table.   Thanks to some outstanding dice rolling by Andrew and some disastrous dice rolling by Mick it appeared that the cavalry’s “various weapons” included automatic firearms with laser targeting as they managed to utterly destroy the remains of MacColla’s life guard!

Meanwhile Andrew's left had been advancing on to Castle Hill.  Mick really needed his reinforcements now.  Gordon’s Horse unit arrive but from the opposite side of the table to where it was needed.  There was still no sign of Aboyne or the Strathbogie regiment.  Predictably Mick’s unit on Castle hill could not hold on its own and that objective was then taken by Andrew.

As it stood, Andrew now controlled Garlic Hill and Castle Hill but he now had to reform and move across the valley and assault Aldearn.  This was going to be slow going and all the time under fire from the musketeers in the village.
He had taken the objectives but had taken longer than planned and he ran out of time to take the primary objective.
Saying that he had done considerable damage to the enemy and holding both Garlic Hill and Castle Hill meant that he got a points victory by a single VP.
Historically Andrew did better than Campbell who ended up getting what can only be described as a " right pasting" by Montrose.  To be fair, Montrose was luckier than Mick in that his reinforcements arrived much sooner.


I also realised at the end that my table had been laid out slightly wrong.  Castle Hill really should have been closer to Garlic Hill and Aldearn in that we know that regiment provided a lot of flanking fire on to the Covenanters attacking up those slopes.  The way I had laid the table out meant that this was not really possible.

Saying that I think it was an interesting scenario though credit must go to Mr Giglio.

Sunday, 24 April 2011

"Has God forgotten all I have done for him?"

Myself, John and Rob B got together for a game of Black Powder using Johns rather splendid 15mm Marlburian’s.

John had written a quick scenario pitching the Sun Kings French against Bavarians.

I have commented before that these rules do lend themselves very well to scenario based games rather than straight up head-to-head matches and this game certainly boosted this opinion.

I was playing the French and I had 5 brigades.  3 of foot and 2 of Cavalry.  The 1st foot brigade started the game deployed anywhere on the table and chose to put these on the top of a small rise towards the centre of the table.  Both Rob (B) and I had rolled to see where and when our other brigades were to arrive.  My own from a possible 3 locations on my end of the table and Rob (B) likewise from his end.  Neither of us knew the strength the direction or the timing of the enemies arrival.


I deployed my 1st Brigade with two battalions of Guard flanked by two artillery batteries.  Two reserve battalions of Line infantry were deployed behind but I chose to keep these in Column of March in order to allow for swift movement if needed.

Rob (B) has his 1st Brigade come on wide to my left which meant he was outside the arc of my deployed Cannon.  This Brigade of Cavalry threatened to be able to flank charge my 1st Brigade.  However my reserve columns in the rear came good as they swiftly marched to meet this threat.  Bizarrely; thanks to some appalling command rolling for the next few turns I failed to deploy from Column to line and Rob (B) failed to execute a charge order.

My 2nd, 3rd, 4th and 5th Brigades trundled on over the next 3 turns but again my command rolls kept failing which limited the Brigades movement to a single move per turn. (Units in Column can make one move even if orders have failed).


Rob B was having similar luck with his command rolls so the game slowed somewhat as both sides tried to get their Brigades in to position.

Rob B finally managed to charge one of my Line Battalions that had moved to the right of my Guard battalions on the hill.  They gave effective closing fire and then beat off the charging light horse with such affect that the unit routed.  First Blood to me.

The way both forces had come on to the field;  I was looking very strong on the right but my superiority in numbers would only count if I could now wheel my front line anti-clockwise to engage the enemy Brigades.


On my left things looked a bit shaky.  A brigade of cavalry repeatedly failed to follow orders and though I was hoping to get them in position to secure the French left flank to support the single battalion of French line infantry the cavalry remained too far from the action to have any effect.

Eventually Rob B brought an artillery battery in range and then charged home with two battalion of heavy cavalry which swept the battered French away.  The French left was now dangerously exposed. Although reinforcements were sweeping in from the rear. If I could not get these reinforcements deployed, Rob (B) was position to roll up my whole line.


In the end; though I probably outnumbered Rob (B) on the table, he was much better placed to secure a Bavarian Victory.

The most impressive thing about these Black Powder rules is how authentic the battles seem to look on the table top.  I hope from the photo’s above you will see how these Brigades are being fed in to the line and form in multiple lines in order to provide support.


The beautifully painted miniatures that John has have inspired me to crack on with my 15mm Great Northern War Russian.